
Phaser.js for TABI
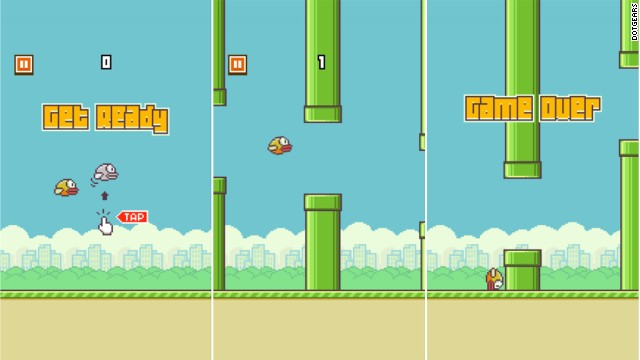
My experience with Phaser.js for the TABI project (which consisted on building mobile games for a kind of tablet targeted to kids) started off in late 2014 by following this amazing tutorial on how to create a game similar to the controversial Flappy Bird.
The goal of the tutorial was to go beyond the basics and cover from general gaming concepts (like prefabs) to more specific topics (like particle generators). And the great thing was that the creator of the tutorial used a really cool yeoman generator for Phaser to create the application.
The project generated by this yeoman generator was already built upon amazing tools such as Browserify in order to modularize code for browsers, JSHint to detect errors and potential problems in the code and EditorConfig for maintaining consistent file formats and coding styles between different editors and IDEs.
It also provided an initial architecture for the game, based on states and prefabs, which heavily depended on JavaScript prototypes to give the app an OOP nature. This was awesome because it provided the necessary structure for the team to be able to have a mental image of all the components involved in the app and build upon that.
Mobile
After finishing the tutorial, the first complex challenge we had to overcome was to bundle the app into an Android apk that could be installed in the TABIs, which had an x86 processor (as opposed to the more popular ARM architecture).
Crosswalk
While investigating how to do that I came across Crosswalk, a tool that generates an apk by wrapping the web application in an up-to-date WebView and that also let’s you choose the architecture to build for.
Crosswalk provides a way to keep up with the latest features released in Chromium and to don’t fall back on performance. However, it doesn’t give you an API to communicate with the host OS native features.
And that’s where Cordova comes in.
Cordova
Cordova is a platform that allows to reuse code across platforms (Android, iOS, etc) and access native device APIs.
We were in need of some native features for most games: Taking pictures with the camera, Text to speech, Using the Native keyboard, Converting a Canvas element to an image, Accessing local files and In App Browser.
But there was a major issue back then: Cordova had no built-in integration with Crosswalk.
So we had to use a tool called cordova-android-crosswalk which provided a custom integration between Cordova and Crosswalk.
It was a pleasure to contribute to this small tool (which is now deprecated), because tylerbuchea was really open to merge PRs that satisfied other people’s needs.
Later on we migrated to the cordova plugin, which made things easier. Now crosswalk is yet another easy to install plugin:
cordova plugin add cordova-plugin-crosswalk-webview.
Phaser Seed
As we made progress on the first game, we started to add some more tools, a few more Grunt tasks and we mutated the initial architecture to something that made sense for our projects.
So when we started developing the second game, I thought we should have a starterkit project in order to kick off games quicker, and based on an consistent architecture across games.
That’s when PhaserSeed came to life, with all the configuration and common components needed for building our games such as: i18n, local storage management, user game settings, common navigation, modals, sound management, assets preloading, environment specific configuration, etc.
This is an outdated version of the seed we ended up using for our late games, but it’s still useful to have as a starting point.
Release Management
Versioning any piece of software is very important for a number of reasons, such as the ability to compare two snapshots of the same software, link the version in an issue tracker, include a specific version as a dependency of another project, among others.
When building an application that will be installed by the final user, it’s essential to have a release management strategy that will allow distribution of a version and a history of versions to let the QA team install a specific version of the app.
In our case, we decided to use Semantic Versioning for our version names.
Manually bumping an application’s version files is a real hassle. That’s why I started looking for a tool that could do that for us. At that moment I came across grunt-bump, which is great (if you are using good old Grunt) for bumping version files such as package.json and bower.json.
However, that wasn’t enough because we were dealing with Cordova’s config.xml version file, which is used for determining the Android package version.
That’s why I decided to extend the tool to support bumping Cordova based projects.
If you are managing your tasks with Gulp you can use gulp-cordova-bump which basically provides the same functionality.
Git
Since we were a medium sized team, I though it would be a good idea to go with a robust git flow for managing feaure branches, hotfixes and releases.
So we included gitflow in all our repositories.
Also we configured a pre-commit hook to check for jscs and jshint errors. We went with the strategy “you can’t commit code that doesn’t comply with the style rules”, which may seem extreme but it gave us good results, especially when adding new team members.
If the timeline hadn’t been so tight, instead of a pre-commit I’d have preferred to setup a job in Jenkins to check for these rules before integrating to development.
Jenkins
To automate the build process we decided to use our company’s Jenkins server, hosted on an Ubuntu Server.
We created one job per application, which performed the build of the latest master branch unless a specific version tag was given.
In order for Jenkins to be able to build an Android Cordova application it was necessary to:
- Download the standalone Android tools and set the necessary environment variables.
- Install the correct Android SDK with
adb. - Install Cordova globally with
npm install -g cordova(this is not necessary if you have cordova as a dev-dependency in your project, since you can create a npm script).
And that’s almost all there is to it, you can follow these instructions for more details.
Then our jobs would execute a Shell script similar to:
I found this useful gist to build iOS applications on Linux, which may be worth trying if you need to build for iOS.
Distribution
When distributing a mobile application for production there are a few things to consider, such as having a developer account in Google Play (which in our case was provided by the client), releasing the package in production mode and signing the package with a keystore.
However, during the development lifecycle we had a distribution strategy to allow for the client and the QA team to access a new version of each application for each sprint.
TestFairy
For testing purposes, we chose TestFairy as the distribution platform for our mobile applications.
We used a modified version of it’s CLI uploader tool in order to upload the apk from the Jenkins job (there was no Jenkins plugin at the moment).
This would notify QA and the client whenever a new version of the applications was released, and TestFairy handled the distribution and installation process for us.
However, if you use Jenkins I’d recommend you try the TestFairy Plugin which is much more user friendly.
Google Drive
And to distribute the production ready releases with the client we decided to upload them to a shared folder in GDrive.
At first, we manually uploaded the apks by dragging and dropping into the browser’s GDrive tab. But this turned out to be cumbersome when we increased the number of games we had to manage.
Luckily, we found a CLI tool for GDrive to help automate the process.
And we wrote a script similar to the one below to upload the packages.
Open Source and Community
As I’m sure you’ve noticed by now, I’ve been mentioning technologies that share one main property: they are all open source and some of them are community driven.
And it is my belief that as a consumer of this abundant amount of open source technology, it’s essential that we as a software community contribute to it.
That’s why I like getting involved in the forums and channels related to the technologies I use.
Whenever I can, I try to find ways of abstracting the problems I encounter, in order to come up with solutions that will help other people that may have similar scenarios.
In the case of Phaser, a colleague and I saw an opportunity to contribute to its community by enhancing a plugin to create cool transitions between states, and it all started by reading a forum post.
The original plugin has been upgraded so I recommend you use that one instead.
For Cordova, apart from gulp-cordova-bump and cordova-android-crosswalk I thought that sharing the module we had to save a Canvas element as an image could be of help to other people.
This one also involved a Cordova plugin for Android Canvas2ImagePlugin.
Conclusion
Lots of tools and technologies were involved in this project.
The discovery and learning process of all of them was really exciting.
And it wasn’t until writing this post that I realized how much of them have been upgraded or replaced with new ones.
Take for example the core of our build process. If we had to do this today, we probably would’ve chosen Webpack as our module bundler, babel to get all the benefits from ES6, eslint, no Bower (just npm modules and scripts) and maybe phaser-es6-webpack as the starterkit.
And I think that’s one of the things I enjoy most of our line of work.
Learning new stuff never ends